Microgreens are not only a great source of nutrients but also a delightful addition to any dish. Growing microgreens indoors is a rewarding and straightforward process that allows you to enjoy fresh, flavorful greens year-round.
Whether you’re a seasoned gardener or a beginner with a green thumb, this ultimate guide will provide you with all the information you need to successfully grow microgreens indoors.
Table of Contents
Getting Started with Microgreens
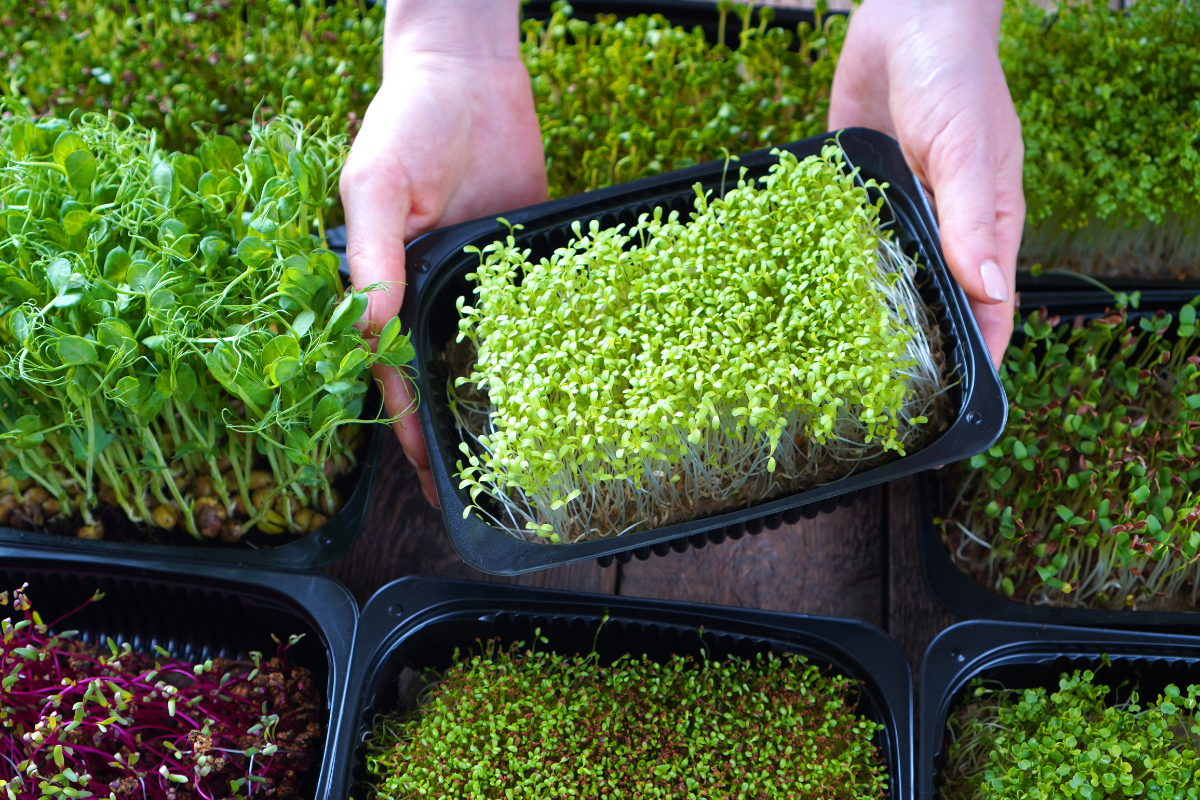
Microgreens are young vegetable greens harvested at an early stage, typically when the first true leaves appear.
They are packed with flavor and nutrients, making them a popular choice for salads, garnishes, and smoothie additions. To get started with growing microgreens indoors, you’ll need the following:
1. Seeds: Choose high-quality, organic seeds of your preferred microgreen varieties. Popular options include broccoli, radish, kale, arugula, and mustard greens.
2. Growing Trays: Use shallow trays or containers with drainage holes to plant your microgreens. These can be plastic or wooden trays specifically designed for growing microgreens.
3. Growing Medium: Opt for a sterile, lightweight growing medium such as potting soil, coconut coir, or peat moss. Ensure that the medium is well-draining to prevent waterlogging.
4. Light Source: While microgreens can germinate in natural light, providing supplemental light with grow lights can help ensure healthy and uniform growth.
Step-by-Step Guide to Growing Microgreens Indoors
Follow these steps for a successful indoor microgreens growing experience:
1. Prepare the Growing Trays: Fill the trays with the growing medium, leveling it evenly and lightly pressing it down to create a smooth surface.
2. Sow the Seeds: Sprinkle the seeds evenly over the surface of the growing medium, ensuring that they are not overcrowded. Gently press the seeds into the medium to ensure good seed-to-soil contact.
3. Watering: Mist the seeds with water using a spray bottle, ensuring that the growing medium is evenly moist but not waterlogged. Cover the trays with a plastic lid or damp paper towel to maintain moisture during germination.
4. Germination: Place the trays in a warm, well-lit area, away from direct sunlight. Seeds should begin to germinate within a few days, at which point you can remove the cover and place the trays under grow lights or in a sunny window.
5. Care and Maintenance: Ensure that the microgreens receive adequate light and water as they grow. Keep the growing medium consistently moist but not waterlogged, and provide 12-16 hours of light per day to promote healthy growth.
Harvesting and Enjoying Your Microgreens
After about 1-3 weeks, depending on the variety, your microgreens will be ready for harvest.
Use clean scissors to snip the greens just above the soil line, and they are ready to be enjoyed in salads, sandwiches, smoothies, or as a flavorful garnish for various dishes.
Benefits of Growing Microgreens Indoors
Growing microgreens indoors offers several benefits, including:
1. Year-Round Harvest: Indoor growing allows you to enjoy fresh microgreens regardless of the season.

2. Nutrient-Rich Greens: Microgreens are packed with essential vitamins, minerals, and antioxidants, making them a valuable addition to a healthy diet.
3. Space-Efficient: Indoor growing is ideal for those with limited outdoor space, as microgreens can be grown in compact trays on countertops or shelves.
In conclusion, growing microgreens indoors is a simple and rewarding way to incorporate fresh, nutrient-rich greens into your diet. With the right tools, a bit of patience, and regular care, you can enjoy a constant supply of vibrant, flavorful microgreens right in your own kitchen.
Whether you’re a culinary enthusiast, health-conscious individual, or avid gardener, indoor microgreens growing is an enjoyable and beneficial endeavor that anyone can explore.