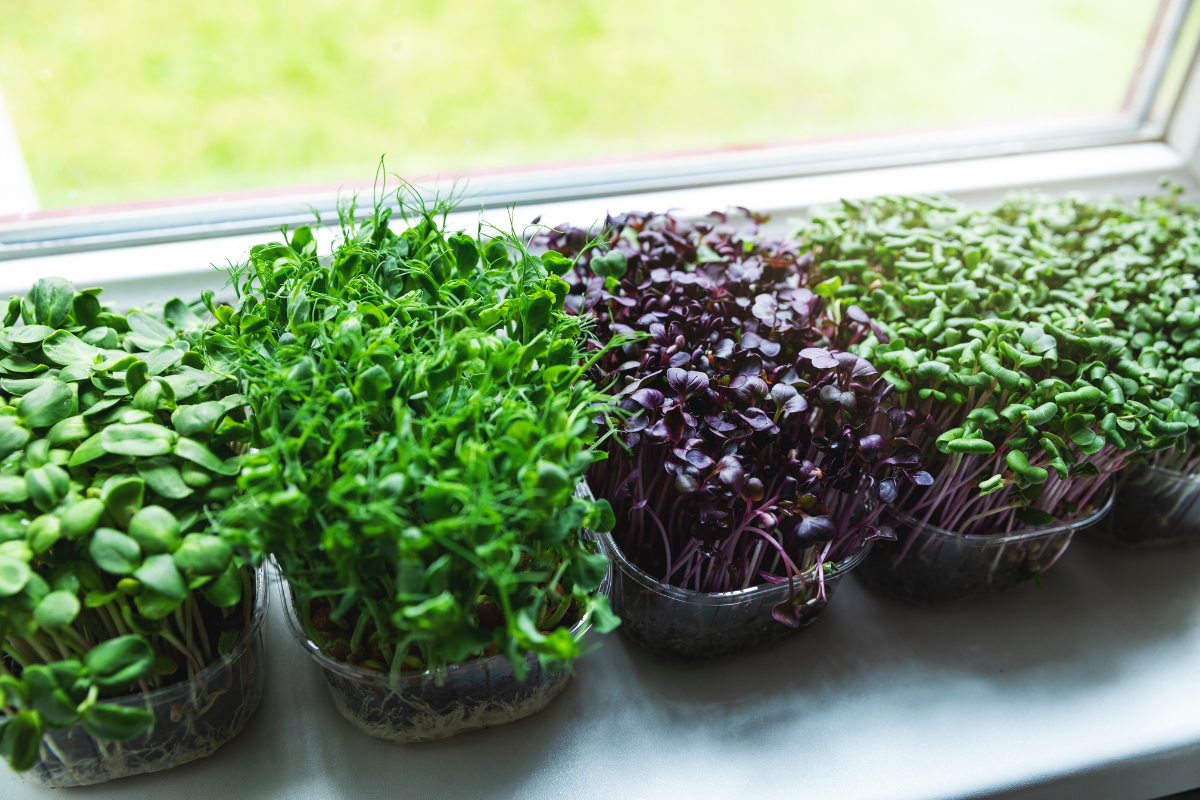
Are you looking for a quick and easy way to add some fresh greens to your diet? Look no further than microgreens!
These tiny plants pack a big punch of nutrition and flavor, and the best part is, you can grow them right in your own home without any soil.
In this post, we’ll show you everything you need to know about how to grow microgreens without soil
Get ready to become a microgreen master in no time!
Table of Contents
Tools Required
- Tissues – It is the tissues that are going to hold the root of the microgreens instead of the soil. So you require about 5 – 6 tissues.
- Plastic tray or container with holes – A plastic tray (not a hard and strong plastic) the regular ones you get for food take away, the ones the salads are stored in at the grocery store works the best. Make sure the tray has a good number of holes under it for good drainage of water.
- Seeds – You will of course need the seeds of the microgreens that you want to grow.
- Water – Another inevitable item is water.
How to grow microgreens without soil
Step 1 – Take several folds of tissues and place them in a plastic rectangular tray.
Step 2 – Now spray water all over the tissues and ensure they are wet and moist but not soggy. Sprinkle any seeds that you want to grow all over the tissue.
Step 3 – Now spread the seeds evenly all over the tissues to avoid clumping up the seeds at one particular spot.
Step 4 – Now spray water like a mist over the seeds.
Step 5 – After this place the tray in a completely shady area without exposing the tray to sunlight. During the germination phase, the microgreens don’t need sunlight. The germination phase can last from 3 – 5 days depending on the type of seeds you used.
Step 6 – During this interval watering is essential. But watering during the germination phase is quite different. Add some water to a plate and keep the plastic tray with holes on it on top of this plate with water.
The water will get into the tray through the holes in the tray and the tissue will absorb the water. So it absolutely necessary for the plastic tray to have drain holes to let the excess water out of it.
Step 7 – Use filtered water and not tap water for these plants. After the seeds have germinated keep the tray in mild indirect sunlight.
Step 8 – After the seeds have germinated, you can start watering them by spraying water on the tissues and not just on the leaves.
Since there is no soil involved in the entire process, these microgreens don’t require fertilization and are not prone to the attack of pests.
Once the leaves are dense they are ready to harvest. This entire process will take anywhere from 2 to 3 weeks (depending on the seeds)
Conclusion
Growing microgreens without soil indoors can be a great way to get fresh, nutritious greens into your diet easily and with minimal effort.
With the right materials and knowledge, you can start growing your own microgreens in no time!
From selecting the right containers to understanding the importance of light and water, this guide has provided you with all the information needed to successfully grow microgreens at home.
Start experimenting with different types of seeds today – you may just find yourself hooked on growing these miniature versions of vegetables!